Brake Judder: Preventative Steps
24 Aug 2020
Category:
Pre-Inspection
- Test drive the vehicle before removing any parts to confirm symptoms
- Examine the tyres as radial separation and damaged/uneven tyres can cause symptoms similar to those caused by brake related issues
- Inspect the wheel bearings as a worn bearing can cause excessive lateral runout, making the brakes to pull or pulsate
- Check the steering and suspension components for free Worn bushes cannot absorb vertical and lateral forces during braking and can cause juddering
- Examine the steering and suspension bushes and joints for any free Worn steering and suspension bushes will not be able to absorb vertical and lateral forces produced by the vehicle when braking and can cause juddering.
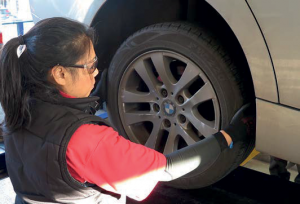
Removal
- Can the pads move freely in the caliper carrier? Corrosion build up can cause the pads to seize*
- Are the caliper fingers and piston contact in the right places? Corrison can cause misalignment of the pads*
- Remove the Are the sliders and rubber boots preventing free movement? If in doubt of their condition, renew*
- Can the caliper pistons move freely?*
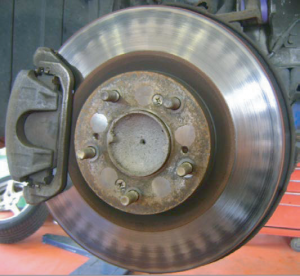
- Measure the brake discs using a micrometre in at least eight different points at equal distance from each other around the perimeter (2.5mm from the outer edge). An excess of more than 0.03mm of thickness variation will result in brake torque variation and brake judder

*Anything preventing free movement of brake components will affect the material transfer process, leading to excessive disc thickness variation, which causes brake judder.
Preparation
- With a tool that will not compromise the metal, remove corrosion from the caliper carrier, caliper fingers and piston contact points**
- Inspect the hub and remove the corrosion build up using a suitable tool**
- Treat and protect all surfaces by applying a water resistant, metal free lubricant with a high melting point**
- Completely remove all sliders and clean thoroughly, including their cavities
- Treat and protect sliders with a rubber compatible, water-resistant lubricant
**Corrosion build-up alters braking component tolerances. More information can be found on our website.
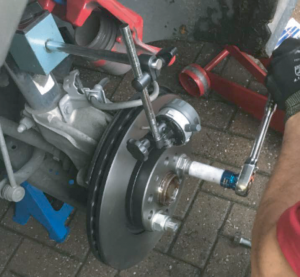
Refitting
- Replace brake discs as an axle set to keep braking consistency
- Clean the disc and mounting Dust and foreign objects trapped between the mounting surface of the disc and the hub will cause lateral runout. This can lead to disc thickness variation and brake judder
- If the component is equipped with a disc locating screw, renew and replace as it secures the brake disc and prevents dust and debris from entering behind it
- Mount and secure the disc and check for disc run out using a DTI This should be no greater than 0.08mm and anything more can cause excessive lateral runout, disc variation thickness and brake judder
- Examine and thoroughly clean the contact surface of the Contamination or poor quality wheel alloys will cause excessive lateral runout and brake judder
- Torque wheel bolts following in the correct Incorrect torque could damage the disc hat, distorting the hub contact surface, causing excessive lateral runout and brake judder
Aftercare
- Follow the recommended bedding-in procedure outlined on our The process will take longer for fully coated discs as the coating must be removed for the material transfer process to take effect evenly on the disc surface
- Ensure the driver is aware of the recommended aftercare for the initial 200 miles (at least) and that the material transfer process can still be affected after this if using an incorrect braking technique
NAPA brakes are only coated on the hub and edge surface.